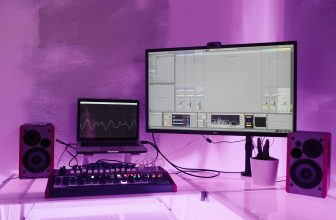
Screen recording has become an essential feature for both casual and professional users. Whether you’re creating a tutorial, capturing gameplay, recording a webinar, or saving a video call, knowing how to screen record effectively on your Windows 10 or Windows 11 system can be incredibly useful. Fortunately, Microsoft has built-in tools and compatibility with third-party software to make this process seamless.
In this guide, we’ll walk you through how to screen record on Windows 10 and Windows 11, using native tools and popular third-party apps, with step-by-step instructions for each.
Why Use Screen Recording on Windows?
Before diving into the methods, let’s understand why screen recording is valuable:
- Create tutorials or walkthroughs for students or colleagues
- Capture bugs or issues to report them effectively
- Record online meetings or webinars for later reference
- Save gameplay for streaming or sharing
- Create content for YouTube or social media
Method 1: Use Xbox Game Bar (Built-in on Windows 10 & 11)
The easiest way to screen record on Windows 10 and 11 is by using the Xbox Game Bar, a built-in tool that’s primarily designed for recording gameplay but works well with most applications.
How to Open Xbox Game Bar:
Press Windows key + G on your keyboard.
This opens the Game Bar overlay.
How to Start Recording:
Once Game Bar opens, locate the Capture widget.
Click on the Record button (●) or press Windows + Alt + R.
A small recording bar appears on the screen showing the duration.
To stop recording, press Windows + Alt + R again or click the Stop button in the overlay.
Where Are Recordings Saved?
- Navigate to: This PC > Videos > Captures
Pros:
- Built-in, no installation needed
- Works seamlessly with most apps
- Hotkey access for ease
Cons:
- Can’t record File Explorer or desktop
- Limited editing features
Method 2: Screen Record with Microsoft Clipchamp (Windows 11)
With the launch of Windows 11, Microsoft added Clipchamp, a free video editor that also supports screen recording.
Steps to Record Screen Using Clipchamp:
Search for “Clipchamp” in the Start menu and open it.
Sign in using your Microsoft account.
Click on Create a new video.
Select the Record & Create tab from the side panel.
Choose Screen recording.
Pick the screen, window, or tab you want to record.
After finishing, click Stop Sharing.
Edit or export your video.
Pros:
- User-friendly interface
- Built-in editing tools
- Works great for tutorials and presentations
Cons:
- Requires a Microsoft account
- May use more system resources
Method 3: Use PowerPoint to Record Screen
Not many users know that Microsoft PowerPoint has a screen recording feature built-in.
Steps:
Open PowerPoint and go to Insert > Screen Recording.
Select the area of the screen you want to capture.
Click Record.
After recording, the video will be embedded in the slide.
Right-click the video and select Save Media As to store it as a separate file.
Pros:
- Great for educators and students
- Built-in for Microsoft 365 users
Cons:
- Limited to the area selected
- No advanced editing tools
Method 4: Using Third-Party Software (OBS Studio)
For advanced users, OBS Studio (Open Broadcaster Software) is a free, open-source solution ideal for screen recording and live streaming.
How to Use OBS Studio:
Download OBS Studio from the official website.
Install and launch the app.
Under Sources, click the + icon and choose Display Capture or Window Capture.
Click Start Recording.
Once done, click Stop Recording.
Your video is saved in the Videos folder by default.
Pros:
- High-quality recording
- Supports multiple sources (webcam, microphone, windows)
- Great for streamers and content creators
Cons:
- Steeper learning curve
- More complex setup
Best Practices for Screen Recording
To ensure the best results when screen recording, follow these tips:
Enable Microphone Input
If you want to add narration, make sure your mic is enabled in the tool settings.
Close Background Apps
Free up RAM and avoid pop-ups or lag during the recording session.
Choose the Right Resolution
Most tools allow you to record in HD or Full HD. Opt for 1080p for clearer videos.
Record in Short Segments
If your content is long, break it into segments. This makes it easier to edit and manage.
Check Storage Space
Ensure you have enough disk space, especially when recording in high quality.
Conclusion
Whether you’re on Windows 10 or the newer Windows 11, screen recording is a breeze thanks to built-in tools like Xbox Game Bar and Clipchamp. For quick tasks, Game Bar is ideal. For presentations, PowerPoint works wonderfully. If you’re a content creator or streamer, OBS Studio offers powerful features and flexibility.
No matter your purpose—education, gaming, or professional work—this guide equips you with everything you need to record your screen like a pro.


