In today’s digital age, recording your screen has become an essential skill for work, education, and entertainment. Whether you’re creating a tutorial, recording a presentation, saving an online lecture, or capturing gameplay, being able to record your screen with voice can make your content more engaging and easy to understand. Thankfully, you don’t need to be a tech wizard to do it. There are plenty of simple methods that let you record both screen visuals and your voice in just a few clicks.
In this blog, we’ll explore why screen recording with voice matters, the best tools for the job, and step-by-step methods to make your recordings smooth, professional, and effortless.
Why Record Screen with Voice?
Screen recording alone can show what you are doing, but adding your voice explains why you are doing it. This combination can make your videos far more valuable.
Here are a few reasons why it matters:
Better Understanding – Your voice can guide viewers through complex steps, making instructions clearer.
Personal Connection – A voiceover adds a personal touch, helping you connect with your audience.
Time-Saving – Explaining verbally is often quicker than adding text annotations later.
Versatility – Great for training videos, online classes, YouTube content, gaming commentary, or work demos.
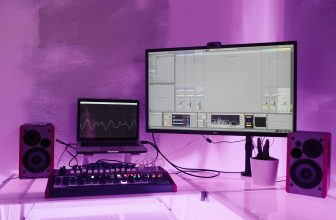
Choosing the Right Screen Recording Tool
While there are many software options, choosing the right one depends on your needs:
• For Quick Recordings: Use built-in tools like Xbox Game Bar (Windows) or QuickTime Player (Mac).
• For More Features: Try OBS Studio, Camtasia, or Screencast-O-Matic.
• For Beginners: Use browser-based recorders like Loom or ScreenRec — no installation hassle.
• For Mobile Devices: Apps like AZ Screen Recorder (Android) and TechSmith Capture (iOS) work well.
How to Record Screen with Voice – Step-by-Step
Let’s break it down into easy-to-follow methods for different platforms.
- On Windows – Using Xbox Game Bar
Windows has a hidden gem for quick screen recordings: the Xbox Game Bar.
Steps:
Press Windows + G to open the Game Bar.
Click on the microphone icon to enable voice recording.
Press Windows + Alt + R to start recording.
Speak through your microphone while performing on-screen tasks.
Press the same shortcut to stop recording.
Find your recording in the Videos > Captures folder.
Pros:
• Built-in, free, easy to use.
• Records both system audio and microphone voice.
Cons:
• Limited editing features.
• Cannot record File Explorer or desktop directly. - On Mac – Using QuickTime Player
Mac users don’t need third-party apps for basic screen + voice recording.
Steps:
Open QuickTime Player.
Go to File > New Screen Recording.
Click the arrow next to the record button and select your microphone.
Choose whether to record the full screen or just a portion.
Start recording and speak into your microphone.
Stop recording when done, then save your file.
Pros:
• No installation needed.
• Simple interface.
Cons:
• Limited features compared to professional tools. - For More Control – Using OBS Studio (Windows & Mac)
If you want flexibility, OBS Studio is a top choice – free, open-source, and powerful.
Steps:
Install and open OBS Studio.
Add a Display Capture source for your screen.
Add an Audio Input Capture source for your microphone.
Adjust your audio levels to avoid distortion.
Click Start Recording and narrate while showing your screen.
Stop recording when done, your file is saved locally.
Pros:
• Highly customizable.
• Supports professional-quality video.
• Works for live streaming too.
Cons:
• Learning curve for beginners. - On Mobile – Using AZ Screen Recorder (Android)
For mobile screen recordings with voice, AZ Screen Recorder is simple and effective.
Steps:
Download and install AZ Screen Recorder from the Play Store.
Open the app and enable microphone recording.
Tap the record button and start your on-screen activity.
Speak directly into your phone’s microphone.
Stop recording when finished video will be saved in your gallery.
Pros:
• No watermarks.
• Easy sharing options.
Cons:
• Uses storage space quickly.
• Background noise may affect audio quality.
Tips for a Clear & Professional Recording
Recording your screen with voice is easy, but making it look and sound professional requires a bit of attention:
Use a Good Microphone – Even an affordable USB mic can dramatically improve audio clarity compared to built-in laptop mics.
Reduce Background Noise – Record in a quiet room and close windows to avoid distractions.
Plan Your Script – Have bullet points ready so you stay on track and avoid long pauses.
Adjust Volume Levels – Make sure your voice is louder than background sounds.
Use Headphones – This prevents feedback or echo during recording.
Highlight On-Screen Elements – Use a cursor highlighter or annotations for emphasis.
Keep it Concise – Long, unstructured videos can lose viewers’ attention.
Editing Your Recording
Once your recording is complete, you may want to trim mistakes, add titles, or improve audio. You can use:
• Free tools like Shotcut, DaVinci Resolve, or iMovie.
• Paid tools like Camtasia or Filmora for more advanced editing.
Basic edits to consider:
• Cut out unnecessary pauses.
• Add intro/outro slides.
• Insert captions or callouts.
• Boost or clean up audio.
Best Practices for Sharing Your Screen Recording
After recording and editing, you might want to share it with your audience:
• For Work: Upload to Google Drive, Dropbox, or Microsoft OneDrive for easy sharing.
• For Learning: Post on LMS platforms like Moodle or Google Classroom.
• For Public Sharing: Use YouTube, Vimeo, or social media.
Always choose the right format (MP4 is most common) and resolution (1080p is standard) for a balance between quality and file size.
Final Thoughts
Learning to record your screen with voice is a valuable skill that can enhance your productivity, communication, and content creation. Whether you’re making tutorials, gaming videos, or business presentations, the process doesn’t have to be complicated. From built-in tools like Xbox Game Bar and QuickTime to powerful options like OBS Studio, there’s a solution for every need and skill level.
The key is to prepare well, speak clearly, and keep your recordings engaging. With the right setup, even a complete beginner can produce professional-looking videos in minutes.
So the next time you want to explain something visually, hit record, speak up, and share your knowledge, the simple way.