Apowersoft screen recorder pro is a powerful screen capture application that has multiple features. You can easily record any activity from the screen with audio input from system sound, microphone or both. The recorded videos can be saved in different formats like WMV, MP4, VOB, AVI, FLV and more. It also has the ability schedule recording task and upload YouTube videos to FTP and you tube. Please follow the steps to record your screen using Apowersoft:

Step 1: You should configure setting before recording
Step 2: In this screen recorder, you can configure setting like audio input before recording and choose three audio sources within this program like system sound, microphone and system sound and microphone.
Step 3: Configure general setting to meet the requirement and there is multiple record setting to produce a high quality screencast.
Step 4: Set hotkeys and output directory as well as control recording by shortcut.
Step 5: Record mouse cursor while creating instructional tutorial and it is necessary to record mouse cursor movement.
Step 6: Customize output video format where recorded video will be normally saved in WMV format and you can also save it desirable output format from video format menu.
Step 7: Before recording, you can also select the bit rate, frame rate, audio format and other elements for recording video.
Step 8: After completing the above setting and then you can start the recording mode.

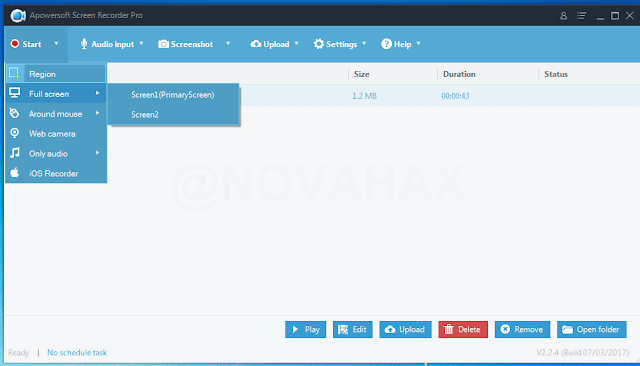
Step 9: Select one recording mode to record anything on the computer and audio on the computer. It has five recording mode and select the required one.
Step 10: Initiate the recording by choosing region mode where you can simply click and drag mouse cursor along the region you want to capture. You can also customize recording resolution in this step.
Step 11: You can also move recording region while capturing and move recording area while capturing is added. This is a optional one
Step 12: Annotate screen recording (optional) which allows you to edit the video during screen recording. You can add lines, arrows, circle, rectangle, text and more.
Step 13: Once the recording is over, you can click the red stop button and then it can be saved to your local disk automatically.
Step 14: Schedule recording task lets you to create schedule task for recording and you can access this feature by going to setting in the middle of the main menu. You can set task name, start time, duration and stop time.
Step 15: Upload screencast to youtube directly and also take screen shot from various format like PNG, JPG, BMP and TIFF.
Step 16: Record iOS screen as video and to use it drop down record and start menu and then select iOS screen recorder from the menu.
Step 17: Convert and edit video converts video/audio files to various video/audio format. You can also trip and crop video, adjust brightness, volume, saturation and add watermark.
There is also additional features like schedule recording task, upload screencast to YouTube, take screenshot, record iOS screen as video and convert and edit video from Apowersoft Screen Recorder Pro.